Step 1
Install the integration for your portal by visiting hubspotpdf.manobyte.com or by visiting the App Marketplace. This will begin a free 7 day trial of all features.
Sometimes you still need a paper trail. Generate styled PDFs from your HubSpot data with ease.
Install App

PDFs are a great format for sharing form submission information with your clients and colleagues. These PDFs are useful when sharing information about a potential client with your agents, printing documentation regarding a business request, or just having a document of a submission to store for future reference.
The custom module is great for your clients, because it allows them to immediately have a printable document regarding a request they have made on your website.
Install the integration for your portal by visiting hubspotpdf.manobyte.com or by visiting the App Marketplace. This will begin a free 7 day trial of all features.
The HS Forms module will take you to all of your HubSpot forms. From here you are able to browse all of your forms or search by a key term.
Select a Form by clicking on the form name in the table.
Next, you will be able to browse and search through all of the submissions for that form.
Once you have found a submission you would like a PDF of, simply click the Create PDF button to the right of the submission preview.
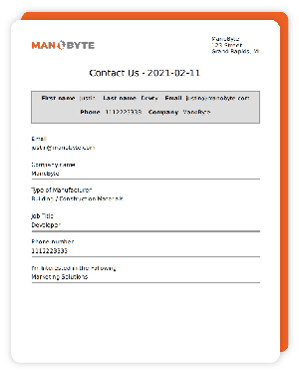
Here, you are given a variety of options to select from for PDF Header and Contact Information.
The information you use for the Header info will be saved for future use.
Once all of the information is ready, click Create PDF and the PDF will be available to view and download!
Review the sections below to learn about the form filler feature and workflow automation.
The Custom Modules for generating PDFs directly from a webpage are automatically installed to your portal behind the scenes as soon as you set up your subscription.
The modules are labelled "MB_Form_PDF" and "MB_Form_Filler_PDF". Both modules work the same as the standard HubSpot Form module, with a few extra options. The "MB_Form_PDF" module is used for the standard PDF documents, and the "MB_Form_Filler_PDF" module is used for Form Filler templates.
In order to use the Custom Module on one of your pages, you must add the domain of your website to the Domains tab. Include any domains and subdomains you will be using the module on.
Now the module will be available in your HubSpot CMS to use wherever you would like!
After your trial has expired, you will need to submit a payment method for a $9.99/month subscription for the standard features, or $19.99/mo for the premium form filler features (see step-by-step below for form filler explanation).
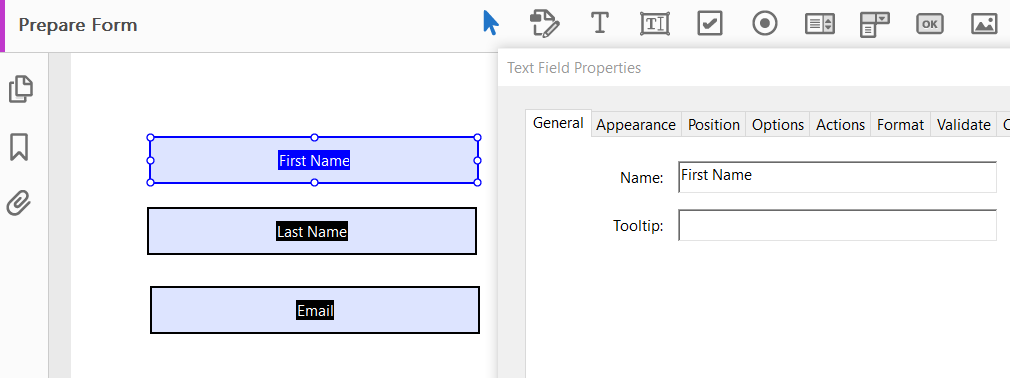
Create a PDF form document that will be used as your template. With this template, you will have form fields. These form fields are typically editable, but they can be marked as Read Only as well. Each of these form fields should have an easy to identify name.
In Adobe Acrobat PDF, form fields look like this. If you have a premade form that does not have any fields added, one method of adding these fields in Acrobat is to click Tools > Prepare Form. From there you will want to edit the names of each of these fields to be referenced later.
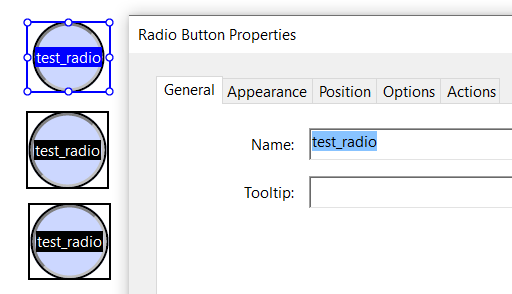
For radio buttons on your PDF template that correlate to a radio/single select in Hubspot, you will need to make sure each of the buttons has the same name, this will be the name that is mapped to a HubSpot property.
Each radio button will need to have the correct HubSpot internal value assigned that correlates to that particular button. If the top radio button is meant to represent the HubSpot value of "one", then this is the value you will give the radio button in the Radio Button Choice section under the Options tab. Single checkboxes in HubSpot work similarly to this. For the checkbox on the PDF template that is being mapped to, the Export Value under the Options tab needs to be "true".
** Due to formatting complications, multi-select fields in Hubspot have a limited range of support. Multi-select fields can be displayed in a text field as a semi-colon separated list of options, but currently there is no support for filling multiple checkboxes. An alternative could be to create individual fields for each of your multi-select options and using the approach above.
Go to the Form Filler tab in the left menu to begin adding your template by clicking the Add button in the upper right-hand corner. The first step is to select your file for upload.
Next, you will be mapping your form fields with HubSpot contact properties. You can use this tool for both contact and company records. Reference your PDF document to get the proper name for your form fields. Match these with a valid contact property by entering that property's internal value or using the search bar to look up this internal value for you conveniently. This pairing is case-sensitive, so be sure to have these entered precisely.
Submit your new template once you are ready and you will be able to start generating your PDFs.
To generate a PDF, click the name of your template from the list. This will open a pop-up where you can select the contact and/or company you would like to generate a PDF for. Once the PDF is generated you will see the Download PDF link below the form. This may take a minute. If you receive an error, it is likely that you have specified a form field or contact property incorrectly. Double-check your values and edit the template in this situation.
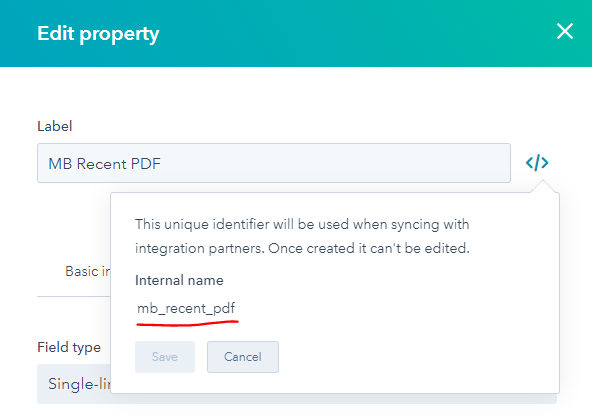
There are two workflow actions that are available as a user of this app. One is labeled MB PDF Standard Link, which is for the standard PDFs, and the other is MB PDF Filler Link, which is for the premium form filler templates. The first step to using this feature is to add a single-line text contact and company property with the name MB Recent PDF. You can use whatever label you would like for this property, but the internal ID for the property needs to be mb_recent_pdf.
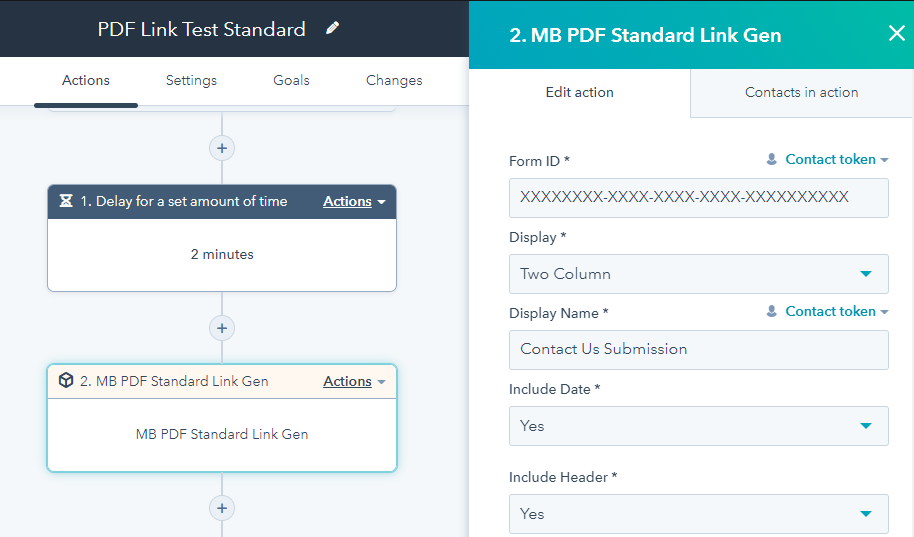
For the standard link action, you will see the same styling options available as you find within the app. If you have not generated a PDF on demand within the app yet, we recommend testing the options out there first. The Form ID field needs to be populated with the appropriate internal ID for the form submission you are capturing. This is most easily found in the URL bar while editing a form in Hubspot. All that needs to be provided for the filler link action is the name of the filler template you have configured within the app. It is also recommended to add a 2-minute delay before and after the workflow action, to account for any delays in the HubSpot system.
** The field Custom Template Name NEEDS to be left blank in the MB PDF Standard Link Gen, this is used for special circumstances.
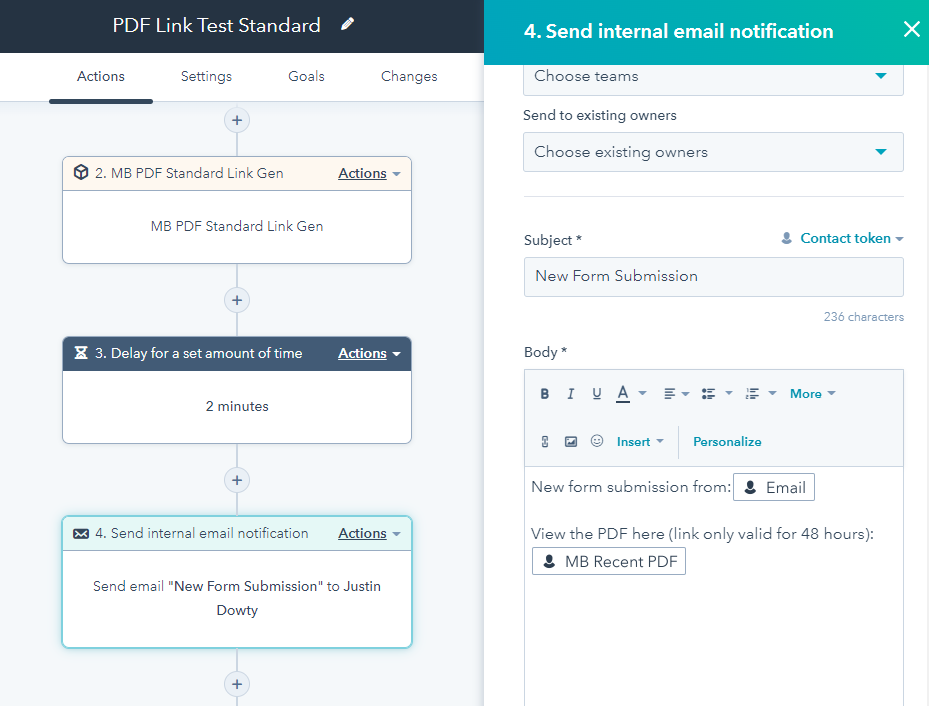
Next, we want to set up an Internal Email Notification to send the link to members of the team. You can put anything you would like in the body of the email, but will want to include the contact personalization token for MB Recent PDF to share the link. These links are only valid for 48 hours, so it is a good idea to mention this in the email and recommend that the recipient download the PDF upon receiving it.
Contact a developer today!

|
At ManoByte, we harness the transformative power of AI to revolutionize how businesses operate. Our cutting-edge solutions integrate AI-driven technologies and best practices to optimize sales, marketing, and customer service processes, ensuring your company stays ahead in a competitive landscape.
© ManoByte 2025 | Privacy Policy | Terms of Service